Clay roof tiles have been a popular roofing material for centuries, and they are known for their durability, aesthetic appeal, and long lifespan. Whether you’re planning to build a new home or renovate an existing one, understanding the process of how these tiles are made can help you appreciate their quality and value. In this guide, we will explore the step-by-step process of making clay roof tiles, different types of roof tiles, and essential information about clay roof tiles.
Understanding Clay Roof Tiles
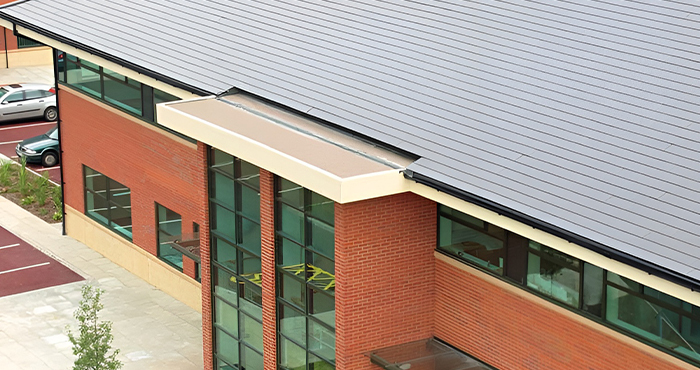
Clay roof tiles are made from natural clay that is moulded, baked, and sometimes glazed to create sturdy, durable tiles. They come in various shapes, sizes, and colours, making them versatile for different architectural styles. These tiles are highly resistant to weather conditions, fire, and insects, which adds to their appeal as a roofing material.
Types of Roof Tiles
Before getting into the process of making clay roof tiles, it’s important to understand the different types of roof tiles available. Each type offers unique benefits and aesthetics:
- Flat Tiles: Simple and smooth, they create a clean, modern look.
- Roman Tiles: Curved tiles that interlock, providing a distinctive appearance and excellent water drainage.
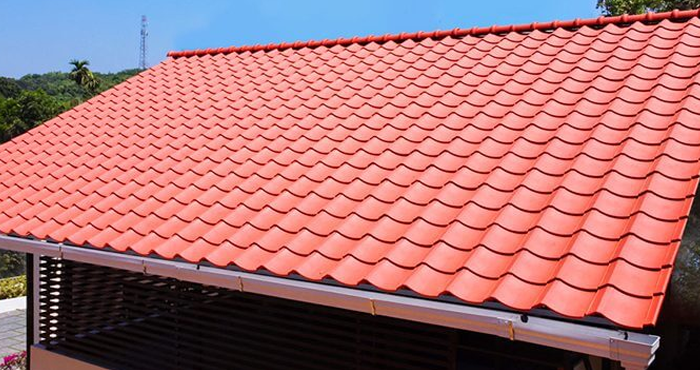
- Barrel Tiles: Semi-circular tiles that create a wave-like pattern commonly used in Mediterranean-style homes.
- Pantile: S-shaped tiles that overlap, offering a traditional look and effective water shedding.
- Interlocking Tiles: Tiles are designed to fit together perfectly, providing additional strength and resistance to wind uplift.
The Process of Making Clay Roof Tiles
The production of clay roof tiles involves several stages, from extracting raw materials to the final firing and quality checks. Here’s a detailed look at each step:
Step 1: Raw Material Extraction
The process begins with the extraction of clay from quarries. The type of clay used can vary, but it typically includes a mixture of minerals that give the tiles their strength and colour. The clay is transported to the manufacturing site, where it is stored and prepared for processing.
Step 2: Preparation and Mixing
Once the clay is at the manufacturing site, it undergoes preparation. This involves crushing and grinding the clay to remove impurities and achieve a consistent texture. The clay is then mixed with water and other additives, such as sand or grog, to enhance its properties. The mixture is thoroughly blended to ensure uniformity.
Step 3: Shaping the Tiles
The next step is shaping the clay into tiles. There are two primary methods for shaping:
- Extrusion: The clay mixture is pushed through a die to form a continuous strip, which is then cut into individual tiles of the desired shape and size.
- Moulding: The clay is pressed into moulds to create tiles with specific shapes and patterns. This method allows for greater variety in design and texture.
Step 4: Drying the Tiles
After shaping, the tiles need to be dried to remove excess moisture. This is typically done in drying chambers or racks, where the tiles are exposed to controlled temperatures and airflow. Proper drying is crucial to prevent cracking or warping during firing. The drying process can take several days, depending on the size and thickness of the tiles.
Step 5: Glazing (Optional)
Some clay roof tiles undergo a glazing process, where a liquid glaze is applied to the surface of the tiles. The glaze not only enhances the aesthetic appeal of the tiles by adding colour and sheen but also provides additional protection against weathering and staining.
Step 6: Firing the Tiles
Firing is a critical step in the production of clay roof tiles. The dried tiles are loaded into kilns, where they are subjected to high temperatures, typically between 1,000 and 1,200 degrees Celsius. The firing process hardens the clay, giving the tiles their final strength and durability. The heat causes the minerals in the clay to fuse, creating a waterproof and weather-resistant surface.
Step 7: Cooling and Quality Control
After firing, the tiles are allowed to cool slowly to avoid thermal shock, which can cause cracking. Once cooled, the tiles undergo a series of quality checks to ensure they meet industry standards for strength, colour consistency, and dimensional accuracy. Any tiles that do not meet the criteria are discarded or recycled into new clay batches.
Step 8: Packaging and Distribution
The final step is packaging the tiles for distribution. The tiles are carefully packed to prevent damage during transportation and are then shipped to suppliers, contractors, or directly to construction sites.
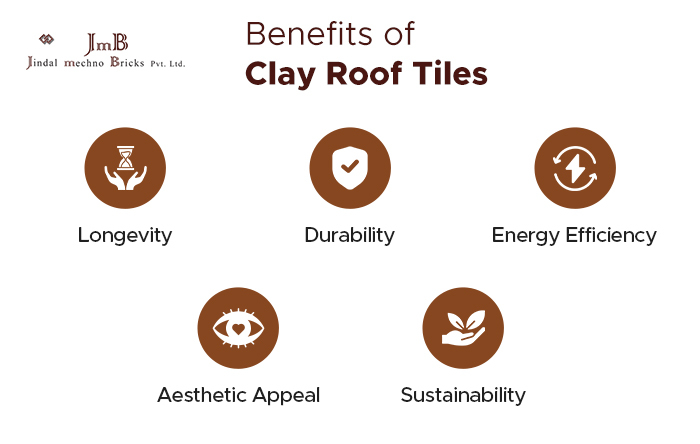
Benefits of Clay Roof Tiles
Clay roof tiles offer numerous benefits that make them a preferred choice for roofing. Some of the key advantages include:
Considerations When Choosing Clay Roof Tiles
When selecting clay roof tiles for your home, consider the following factors:
- Climate: Ensure the tiles are suitable for the weather conditions in your area.
- Weight: Clay tiles are heavier than other roofing materials, so your roof structure must be able to support the weight.
- Cost: While more expensive upfront, the long-term durability and low maintenance of clay tiles can make them a cost-effective choice.
- Installation: Proper installation is crucial for the performance and longevity of clay roof tiles. It is recommended that you hire experienced professionals for the job.
Conclusion
Clay roof tiles are a timeless and durable roofing solution that offers a blend of functionality and aesthetic appeal. Understanding the process of how these tiles are made, from raw material extraction to final firing, can help you appreciate their quality and value.
When choosing wall cladding tiles for your home, consider the benefits, types, and factors mentioned in this guide to make an informed decision that will enhance the beauty and longevity of your home. To get the best building products, visit Jindal Mechno Bricks. We are here to deliver quality clay roof tiles that can make your home strong and appealing.
FAQs
What materials are used to make clay roof tiles?
Answer: Clay roof tiles are made from natural clay that is moulded and then baked at high temperatures to achieve their strength and durability. Sometimes, they are also glazed for additional colour and protection.
How long does it take to make clay roof tiles?
Answer: The entire process, from extracting raw clay to the final firing, can take several weeks. This includes drying time for the shaped tiles and quality control checks after firing.
Can I customise the design of clay roof tiles?
Answer: Yes, clay roof tiles can be customised in various shapes, sizes, and colours. You can choose designs that fit your architectural style and personal preferences.
Are clay roof tiles suitable for all climates?
Answer: Clay roof tiles are excellent for hot and dry climates due to their heat resistance. However, in areas with frequent freeze-thaw cycles, it’s important to choose frost-resistant tiles to avoid cracking.
What are the benefits of using clay roof tiles over other materials?
Answer: Clay roof tiles are durable, fire-resistant, and provide good insulation, helping to reduce energy costs. They also offer a timeless and attractive look that can enhance the value of your home.